When you’re thinking about dessert, few things evoke pleasure quite like chocolate. Perfect for special occasions or a cozy night in, a flourless chocolate cake is a true marvel. Before you dive into that luscious slice that melts on your tongue, consider pairing it with a rich vanilla ice cream or a scoop of fresh whipped cream.
Tart raspberries add a delightful contrast. Oh, and don’t forget a sprinkle of sea salt to enhance the chocolate flavor. Trust me, the balance of the sweet and salty takes this dessert to a whole new level.

Chocolate lovers, gather around! Today, I’m excited to share the decadent yet surprisingly simple recipe of flourless chocolate cake. This dish isn’t just a dessert; it’s an experience. I’ve spent years refining this recipe, and I can’t wait for you to try it. A rich chocolate cake that’s gluten-free and doesn’t skimp on flavor? Sign me up! In my time as a registered dietitian and food enthusiast, I’ve learned how to create desserts that not only taste great but also fit into a balanced lifestyle. Stick with me as we explore the depths of this chocolatey delight together.
What is Flourless Chocolate Cake?
At its core, a flourless chocolate cake is exactly what it sounds like: a cake made without flour. It boasts a dense and fudgy texture, which typically comes from just a handful of ingredients. You won’t find baking powder or fluffy leaveners here. Instead, the stars of this show are rich chocolate, butter, eggs, and sugar. The result is a decadent treat that feels like indulgence but remains simple in its creation. Think of it as the chocolate cake for chocolate lovers—pure and uncomplicated.
What is the Flavor Profile of This Dish?
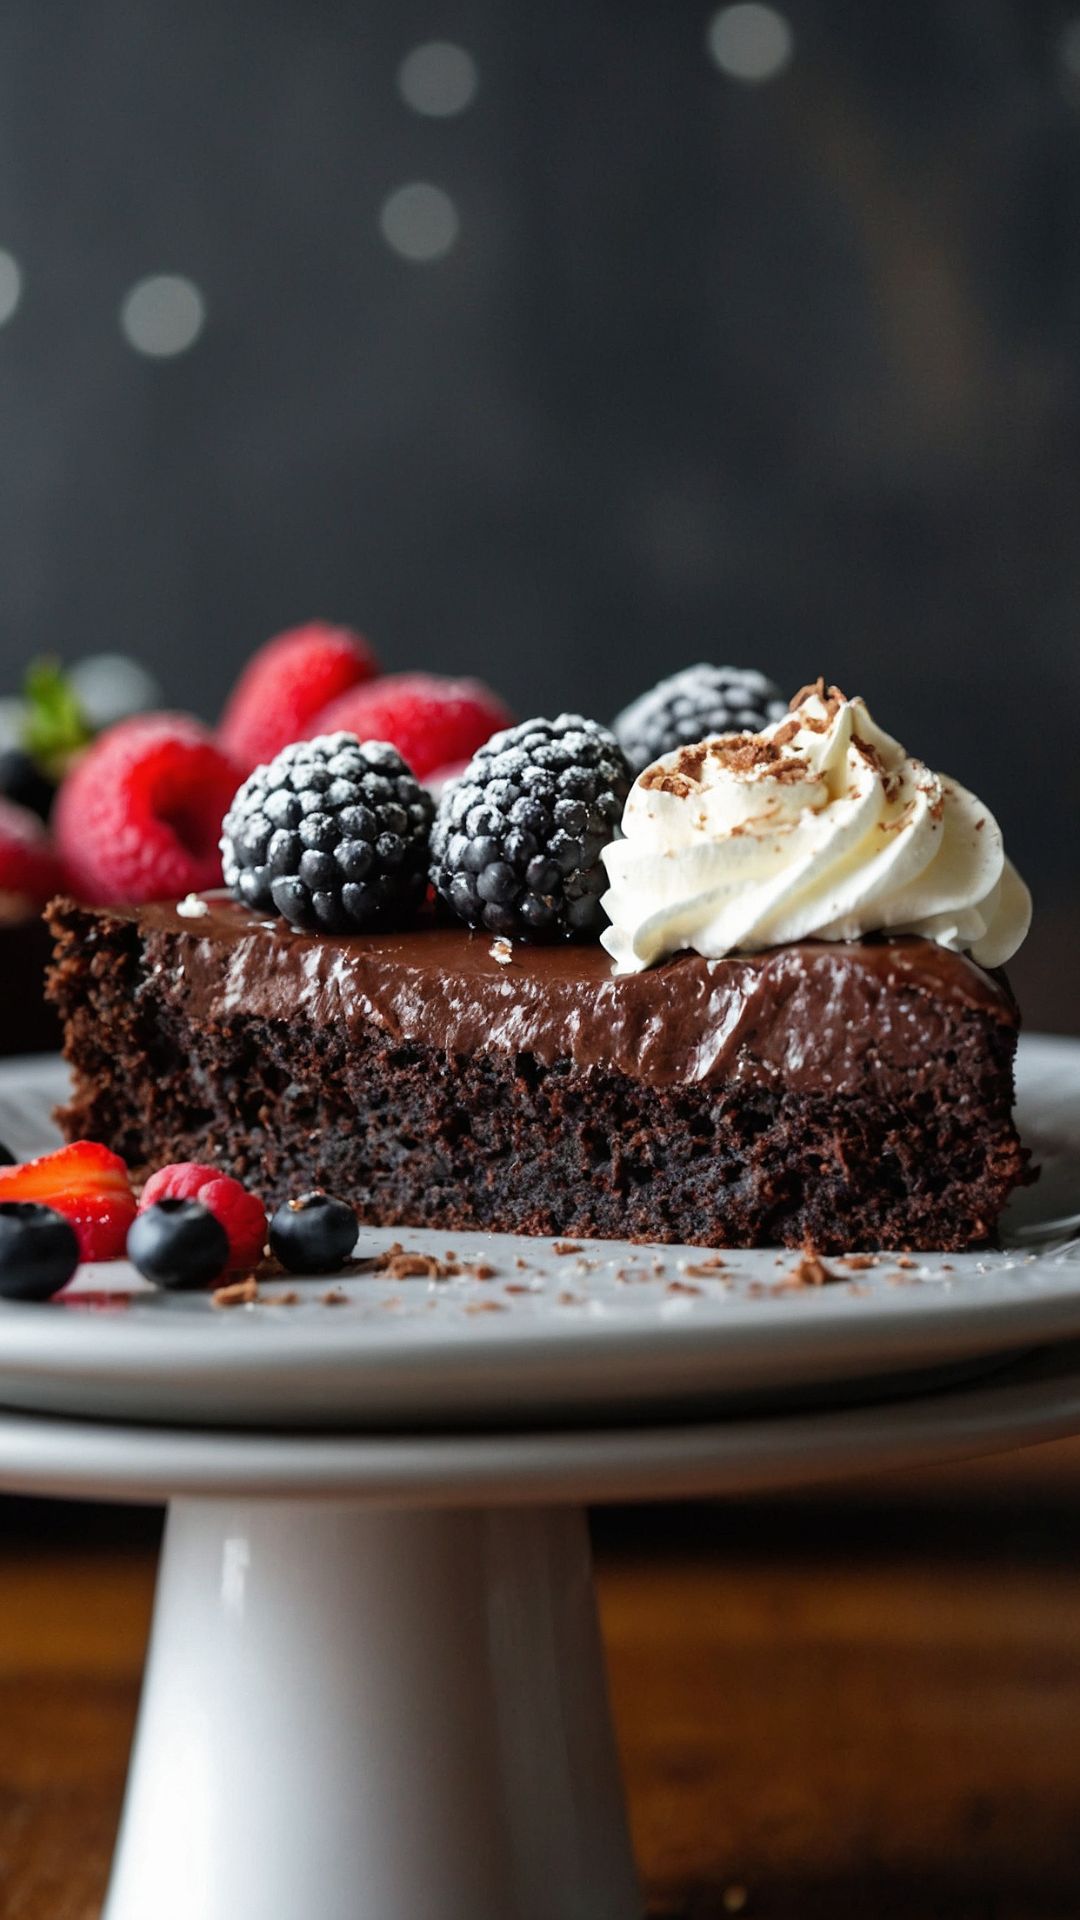
The first bite of a flourless chocolate cake is a revelation. Rich, velvety chocolate envelops your taste buds. The deep cocoa flavor dominates, complemented by a hint of espresso or coffee for depth. The sweetness balances with just the right amount of bitterness, inviting you back for one more forkful. The whipped cream or fresh berries you might add will offer a light contrast to the cake’s richness, making it a perfect marriage of flavors.
You will also like the following Dessert recipes!
Why You’ll Love This?
Let’s face it—life’s too short for boring desserts. If you’re looking for something that will impress your friends at dinner parties or satisfy your late-night chocolate cravings, this cake hits the mark. It’s easy to make and requires minimal cleanup—great for these busy times we find ourselves in. Plus, it’s gluten-free, so your friends with dietary restrictions can delight in it without hesitation. And let’s not overlook the fact that the ingredients are likely already in your pantry. Convenience meets delight right here!
Ingredients
Let’s jump into the magic that makes this cake happen.
Chocolate Espresso Cake Base:
- 6 ounces (170g) premium semi-sweet chocolate, finely chopped
- 1/2 cup (8 Tbsp; 113g) unsalted butter, cut into small cubes
- 2/3 cup (135g) white granulated sugar
- 4 large eggs, room temperature
- 1 and 1/2 teaspoons pure vanilla extract
- 2 teaspoons instant espresso powder
- 1/3 cup (27g) unsweetened cocoa powder (natural or Dutch-process)
- 1/8 teaspoon fine salt
- 1 tablespoon (15ml) brewed coffee or hot water
- 1/4 teaspoon cinnamon (optional)
- 1/2 teaspoon baking powder (optional)
Mocha Whipped Cream:
- 1 cup (240ml) chilled heavy cream or heavy whipping cream
- 1 teaspoon instant espresso powder
- 1 teaspoon warm water
- 1 tablespoon (6g) unsweetened cocoa powder (natural or Dutch-process)
- 3 tablespoons (22g) powdered sugar (confectioners’)
- 1/4 teaspoon pure vanilla extract
- Optional: fresh raspberries and a dusting of powdered sugar for garnish

Step by Step Instructions
Step 1: Melting the Chocolate and Butter
Begin by preheating your oven to 375°F (190°C). Prepare an 8-inch round cake pan by greasing it lightly with butter and lining the bottom with parchment paper for easy removal. In a heatproof bowl, combine the chopped chocolate and cubed butter. Set this bowl over a pot of gently simmering water, creating a double boiler. Stir occasionally until everything is melted and smooth. Remove from heat and let it cool slightly.
Step 2: Mixing the Ingredients
In another bowl, whisk together the sugar and eggs until well combined. The mixture should become pale and fluffy. Gradually add the melted chocolate and butter mixture. Stir in the vanilla extract, instant espresso powder, cocoa powder, fine salt, and optional cinnamon. Mix until everything is well incorporated.
Step 3: Preparing the Batter
If you opted for it, and if you have it on hand, add the baking powder now. It helps create a slightly airy texture. Pour the batter into your prepared cake pan. Spread it out evenly and give the pan a bit of a tap on the counter to remove any air bubbles.
Step 4: Baking the Cake
Place the pan in the preheated oven and bake for 20-25 minutes. Keep an eye on it; the top should look slightly set while the center remains soft. Once done, take it out and let it cool in the pan for about 10 minutes before transferring it to a wire rack to cool completely.
Step 5: Making the Mocha Whipped Cream
While the cake cools, let’s whip up that delicious mocha cream. In a mixing bowl, combine the heavy cream, espresso powder diluted in warm water, cocoa powder, powdered sugar, and vanilla extract. Using a hand mixer or stand mixer, whip until soft peaks form. Don’t whip too long; you want a smooth, spreadable consistency.
Step 6: Serving Your Creation
Slice the cooled cake into rich wedges. Serve with a generous dollop of mocha whipped cream on top and perhaps a sprinkle of fresh raspberries for color and additional flavor. The presentation is beautiful and the taste is divine.
Tips & Tricks
Here are some handy tips to ensure your flourless chocolate cake is a success:
- Chocolate Quality Matters: Use high-quality chocolate. The better the chocolate, the tastier your cake.
- Room Temperature Eggs: Bringing your eggs to room temperature helps them combine better with your other ingredients, allowing for a smoother batter.
- Avoid Overbaking: It’s better to have a slightly gooey middle than a dry cake. A toothpick should come out with a few moist crumbs.
- Double the Recipe: If you’re expecting guests, consider making two cakes. They freeze well for later indulgence.
- Add Flavors: Experiment with extracts or flavorings, like orange zest or almond extract, to give the cake a personal twist.
Nutrition Information
While a slice of this indulgent cake inevitably carries some calories, it’s a satisfying treat. On average, one slice contains approximately:
- Calories: 300
- Fat: 21g
- Saturated Fat: 12g
- Carbohydrates: 28g
- Fiber: 2g
- Protein: 4g
- Sugar: 18g
This version is rich, packing a punch of flavor without the gluten.

How Can You Store This Flourless Chocolate Cake?
Store any leftover cake in an airtight container in the refrigerator for up to five days. If you want it to last longer, wrap it tightly in plastic wrap and place it in the freezer, where it will keep for approximately three months. Just remember to let it thaw in the fridge overnight before serving again.
Alternative Ingredients
What if you find yourself short on an ingredient? No problem! Here are some substitutes to consider:
- Butter: Coconut oil can be used instead. Just ensure it is melted when incorporated into the batter for a delicious dairy-free alternative.
- Sugar: Coconut sugar works well here. It has a similar texture and adds a hint of caramel flavor.
- Eggs: Chia seeds or flaxseed meal can help bind ingredients together. Use 1 tablespoon combined with 3 tablespoons of water to replace one egg.
Equipment
- pan
Ingredients
Chocolate Espresso Cake Base:
- 6 ounces 170g premium semi-sweet chocolate, finely chopped
- 1/2 cup 8 Tbsp; 113g unsalted butter, cut into small cubes
- 2/3 cup 135g white granulated sugar
- 4 large eggs room temperature
- 1 and 1/2 teaspoons pure vanilla extract
- 2 teaspoons instant espresso powder
- 1/3 cup 27g unsweetened cocoa powder (natural or Dutch-process)
- 1/8 teaspoon fine salt
- 1 tablespoon 15ml brewed coffee or hot water
- 1/4 teaspoon cinnamon optional
- 1/2 teaspoon baking powder optional
Mocha Whipped Cream:
- 1 cup 240ml chilled heavy cream or heavy whipping cream
- 1 teaspoon instant espresso powder
- 1 teaspoon warm water
- 1 tablespoon 6g unsweetened cocoa powder (natural or Dutch-process)
- 3 tablespoons 22g powdered sugar (confectioners’)
- 1/4 teaspoon pure vanilla extract
- Optional: fresh raspberries and a dusting of powdered sugar for garnish
Instructions
Step 1: Melting the Chocolate and Butter
- Begin by preheating your oven to 375°F (190°C). Prepare an 8-inch round cake pan by greasing it lightly with butter and lining the bottom with parchment paper for easy removal. In a heatproof bowl, combine the chopped chocolate and cubed butter. Set this bowl over a pot of gently simmering water, creating a double boiler. Stir occasionally until everything is melted and smooth. Remove from heat and let it cool slightly.
Step 2: Mixing the Ingredients
- In another bowl, whisk together the sugar and eggs until well combined. The mixture should become pale and fluffy. Gradually add the melted chocolate and butter mixture. Stir in the vanilla extract, instant espresso powder, cocoa powder, fine salt, and optional cinnamon. Mix until everything is well incorporated.
Step 3: Preparing the Batter
- If you opted for it, and if you have it on hand, add the baking powder now. It helps create a slightly airy texture. Pour the batter into your prepared cake pan. Spread it out evenly and give the pan a bit of a tap on the counter to remove any air bubbles.
Step 4: Baking the Cake
- Place the pan in the preheated oven and bake for 20-25 minutes. Keep an eye on it; the top should look slightly set while the center remains soft. Once done, take it out and let it cool in the pan for about 10 minutes before transferring it to a wire rack to cool completely.
Step 5: Making the Mocha Whipped Cream
- While the cake cools, let’s whip up that delicious mocha cream. In a mixing bowl, combine the heavy cream, espresso powder diluted in warm water, cocoa powder, powdered sugar, and vanilla extract. Using a hand mixer or stand mixer, whip until soft peaks form. Don’t whip too long; you want a smooth, spreadable consistency.
Step 6: Serving Your Creation
- Slice the cooled cake into rich wedges. Serve with a generous dollop of mocha whipped cream on top and perhaps a sprinkle of fresh raspberries for color and additional flavor. The presentation is beautiful and the taste is divine.
Notes
- Chocolate Quality Matters: Use high-quality chocolate. The better the chocolate, the tastier your cake.
- Room Temperature Eggs: Bringing your eggs to room temperature helps them combine better with your other ingredients, allowing for a smoother batter.
- Avoid Overbaking: It’s better to have a slightly gooey middle than a dry cake. A toothpick should come out with a few moist crumbs.
- Double the Recipe: If you’re expecting guests, consider making two cakes. They freeze well for later indulgence.
- Add Flavors: Experiment with extracts or flavorings, like orange zest or almond extract, to give the cake a personal twist.
Nutrition
Frequently Asked Questions
1. Can I make this cake ahead of time?
Yes! This cake can be made up to two days ahead. Keep it stored in the fridge and bring it to room temperature before serving for the best taste.
2. What kind of chocolate should I use?
I recommend using semi-sweet chocolate, as it provides the perfect balance of sweetness. Dark chocolate is also a great option if you prefer a more intense flavor.
3. Does this cake need to be refrigerated?
Given its rich ingredients, it’s best to refrigerate any leftovers. However, if you’re serving it the same day, it’s fine to leave it at room temperature for a couple of hours.
4. Can I add other flavors, like mint or orange?
Absolutely! Adding mint extract or a bit of orange zest can bring new life to this cake. Just remember, a little goes a long way!
5. Can I use oil instead of butter?
Yes! You can use vegetable oil or even olive oil as a substitute for butter. Just keep in mind that it may slightly alter the flavor and texture.
Conclusion
This flourless chocolate cake is more than just another recipe; it’s a tale of simple ingredients coming together to create a delightful experience. Whether you’re baking for a special occasion or just to treat yourself, this cake never disappoints. Plus, it’s a gluten-free option that everyone can enjoy.
So roll up your sleeves and get ready to impress both yourself and anyone lucky enough to share a slice with you. Dive into this chocolatey adventure—I promise you won’t regret it!