As summer unfolds its wings, we often find ourselves mingling at barbecues and gatherings, seeking cool refreshment and delightful desserts. Enter Crème Brûlée, a classic French treat that shines with its creamy custard base and delightful crack of caramelized sugar on top.
But before we dive into the nitty-gritty of its preparation, let’s explore what pairs beautifully with this elegant dessert.
Sitting outside, surrounded by friends and family. You may start the evening with a light, crisp white wine like a Sauvignon Blanc. Not quite ready for dessert? How about an appetizer platter of fresh fruits and cheeses?
A light salad complements the savory spread, leading gracefully into a meal that leaves room for the star attraction: Crème Brûlée.
Once the main course is over, the anticipation builds. Guests can sip coffee or indulge in tea while waiting for the moment of truth. These beverages pair adorably with the rich, creamy texture of our beloved dessert.
A scoop of fresh berries on the side or a sprinkle of finely grated chocolate brings a splash of color and additional flavor.

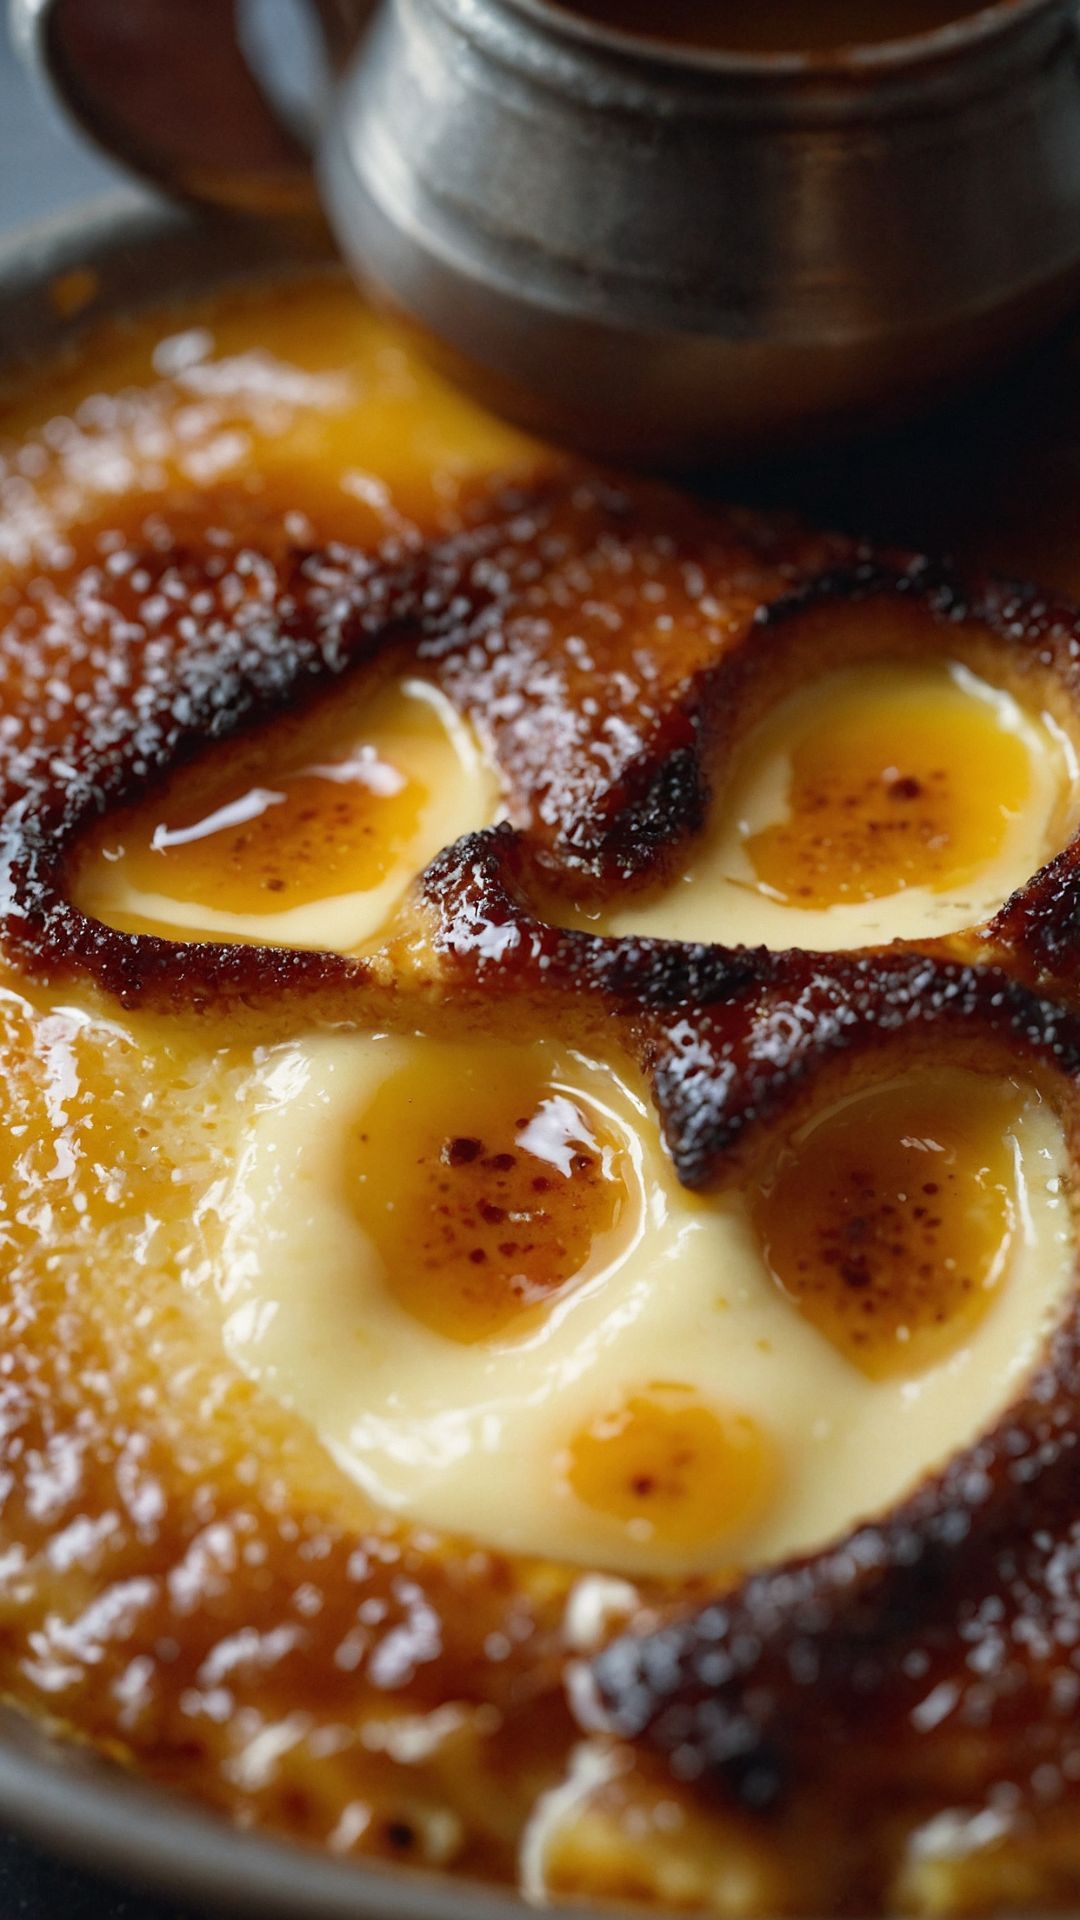
Crème Brûlée stands tall among desserts for its rich flavor and visual allure. With ingredients that are straightforward yet elegant, this dish speaks to the heart of French cuisine.
Its lush custard base, combined with that song of caramelized sugar, is a culinary experience worth embracing.
What Is Crème Brûlée?
Crème Brûlée translates to “burnt cream” in French. This dessert is primarily made from cream, sugar, egg yolks, and vanilla. After cooking, the custard is topped with a layer of sugar that is caramelized to form a brittle topping.
The magic occurs right before serving, where a kitchen torch or broiler transforms sugar into a glossy, glass-like lid that cracks pleasingly when you dive in with your spoon.
You will also like the following Dessert recipes!
Why You’ll Love This Crème Brûlée
There’s something undeniably charming about making Crème Brûlée at home. The process may seem daunting, but it’s surprisingly easy and incredibly rewarding. Imagine presenting this creamy confection to eager friends or family.
The delicate balance of textures, the interplay of sweet and slightly bitter—it’s pure bliss.
But it’s not just about the taste; it’s about the experience. The anticipation builds as you use a torch to caramelize the sugar, creating that essential crust.
Plus, this dessert is highly versatile—you can infuse flavors like espresso, lemon zest, or even chocolate.
The Ingredients You Will Need To Make Crème Brûlée
To whip up a classic Crème Brûlée, you’ll be gathering just a handful of ingredients, each contributing to the dessert’s rich texture and flavor:
- 3 cups heavy whipping cream
- 5 large egg yolks
- 3/4 cup granulated white sugar, divided
- 8 shallow oval ramekins, each 4 ounces
- 1 and 1/2 teaspoons pure vanilla bean extract
- 1/4 teaspoon fine sea salt
- 1 tablespoon dark rum
- 1/2 teaspoon finely ground espresso powder
- Zest of 1 small lemon

Directions to Make Crème Brûlée
Let’s get our hands dirty and dive into the steps to create this magnificent dessert.
Step 1: Preheat Your Oven
Start by preheating your oven to 325°F (162°C). This temperature ensures a gentle bake that keeps the custard velvety smooth.
Step 2: Prepare the Ramekins
Next, place your ramekins in a large baking dish. This allows for a water bath, which helps regulate the temperature and prevents the custard from curdling. Make sure to leave some space between them.
Step 3: Heat the Cream
In a saucepan, combine the heavy whipping cream and half of the granulated sugar (about 1/4 cup). Stir gently, and heat over medium heat until it just begins to simmer. You want to avoid boiling—keep a keen eye on this stage!
Step 4: Whisk the Egg Yolks
While the cream heats, take a medium-sized bowl and whisk together the egg yolks, the remaining sugar, and salt until the mixture is pale and slightly thickened. This step is crucial; it helps create that silky texture.
Step 5: Combine Mixtures
Once the cream is heated, slowly pour it into the egg yolk mixture, whisking constantly. This step is essential—it’s called tempering. You don’t want to scramble the eggs!
Step 6: Add Flavorings
Stir in the vanilla extract, dark rum, espresso powder, and lemon zest. This combination of flavors elevates the dish from ordinary to extraordinary.
Step 7: Pour into Ramekins
Carefully pour the mixture into each ramekin, filling them about three-quarters full.
Step 8: Create a Water Bath
Pour hot water into the baking dish until it reaches halfway up the sides of the ramekins. This water bath is what keeps the custards from overheating.
Step 9: Bake
Place the baking dish in the preheated oven and bake for about 40-45 minutes. The edges should be set, while the center remains slightly jiggly.
Step 10: Chill
Once baked, remove the ramekins from the water bath and let them cool. Cool to room temperature, then refrigerate for at least four hours—or overnight if you have the patience!
Step 11: Caramelize the Sugar
When you’re ready to serve, sprinkle a thin layer of granulated sugar on the top of each custard.
Using a kitchen torch, carefully caramelize the sugar until you achieve that beautiful golden, glass-like crust. If you don’t have a torch, a broiler will work; just watch it closely to prevent burning.
Notes: Tips for the Perfect Crème Brûlée
- Quality Ingredients: Always use the best vanilla extract and heavy cream you can find. These ingredients make a huge difference in flavor.
- Don’t Overheat the Cream: Aim for a gentle heat. Scalding cream can spoil the custard texture.
- Even Baking: Ensure your ramekins are evenly spaced in the baking dish to allow for uniform heat distribution.
- Cool Gradually: Do not put the hot ramekins directly into the refrigerator. Let them cool gradually to maintain texture.
- Practice with the Torch: If you’re navigating this step for the first time, practice a little with the torch on an extra ramekin to get the timing right.
Storage Tips
Crème Brûlée is best enjoyed fresh, especially for that sugary crust. However, you can store the custards in the refrigerator for up to four days.
Just wait to caramelize the sugar until serving time; it maintains its crunch better that way.
Nutrition Information
How To Make Creme Brulee Nutrition Facts

Serving Suggestions
Here are five delightful ways to elevate your Crème Brûlée experience:
- Fresh Berries: A handful of raspberries or strawberries adds freshness and a splash of color.
- Mint Sprig: A simple mint garnish not only looks beautiful but also adds a fun flavor contrast.
- Chocolate Shavings: For chocolate lovers, a sprinkle on top brings a decadent twist.
- Espresso: Serve alongside a shot of espresso for a fabulous combination that’s straight out of a café.
- Caramel Drizzle: A drizzle of warm caramel over top gives an added depth and sweetness.

What Other Substitutes Can I Use in Crème Brûlée?
Creativity flourishes in the kitchen, so let’s explore some substitutions to customize your Crème Brûlée:
- Coconut Milk: For a dairy-free version, use full-fat coconut milk instead of cream.
- Almond Extract: If vanilla isn’t your vibe, almond extract adds a lovely flavor.
- Flavored Coffee Creamer: Experiment by using flavored creamers for an unexpected twist.
- Honey: Replace granulated sugar with honey for a different sweetness and depth in flavor.
- Maple Syrup: This can bring a rustic, earthy sweetness that works beautifully with the custard.
Equipment
- Ramekins
Ingredients
- 3 cups heavy whipping cream
- 5 large egg yolks
- 3/4 cup granulated white sugar divided
- 8 shallow oval ramekins each 4 ounces
- 1 and 1/2 teaspoons pure vanilla bean extract
- 1/4 teaspoon fine sea salt
- 1 tablespoon dark rum
- 1/2 teaspoon finely ground espresso powder
- Zest of 1 small lemon
Instructions
Step 1: Preheat Your Oven
- Start by preheating your oven to 325°F (162°C). This temperature ensures a gentle bake that keeps the custard velvety smooth.
Step 2: Prepare the Ramekins
- Next, place your ramekins in a large baking dish. This allows for a water bath, which helps regulate the temperature and prevents the custard from curdling. Make sure to leave some space between them.
Step 3: Heat the Cream
- In a saucepan, combine the heavy whipping cream and half of the granulated sugar (about 1/4 cup). Stir gently, and heat over medium heat until it just begins to simmer. You want to avoid boiling—keep a keen eye on this stage!
Step 4: Whisk the Egg Yolks
- While the cream heats, take a medium-sized bowl and whisk together the egg yolks, the remaining sugar, and salt until the mixture is pale and slightly thickened. This step is crucial; it helps create that silky texture.
Step 5: Combine Mixtures
- Once the cream is heated, slowly pour it into the egg yolk mixture, whisking constantly. This step is essential—it’s called tempering. You don’t want to scramble the eggs!
Step 6: Add Flavorings
- Stir in the vanilla extract, dark rum, espresso powder, and lemon zest. This combination of flavors elevates the dish from ordinary to extraordinary.
Step 7: Pour into Ramekins
- Carefully pour the mixture into each ramekin, filling them about three-quarters full.
Step 8: Create a Water Bath
- Pour hot water into the baking dish until it reaches halfway up the sides of the ramekins. This water bath is what keeps the custards from overheating.
Step 9: Bake
- Place the baking dish in the preheated oven and bake for about 40-45 minutes. The edges should be set, while the center remains slightly jiggly.
Step 10: Chill
- Once baked, remove the ramekins from the water bath and let them cool. Cool to room temperature, then refrigerate for at least four hours—or overnight if you have the patience!
Step 11: Caramelize the Sugar
- When you’re ready to serve, sprinkle a thin layer of granulated sugar on the top of each custard.
- Using a kitchen torch, carefully caramelize the sugar until you achieve that beautiful golden, glass-like crust. If you don’t have a torch, a broiler will work; just watch it closely to prevent burning.
Notes
- Quality Ingredients: Always use the best vanilla extract and heavy cream you can find. These ingredients make a huge difference in flavor.
- Don’t Overheat the Cream: Aim for a gentle heat. Scalding cream can spoil the custard texture.
- Even Baking: Ensure your ramekins are evenly spaced in the baking dish to allow for uniform heat distribution.
- Cool Gradually: Do not put the hot ramekins directly into the refrigerator. Let them cool gradually to maintain texture.
- Practice with the Torch: If you’re navigating this step for the first time, practice a little with the torch on an extra ramekin to get the timing right.
Nutrition
Frequently Asked Questions
1. Can I make Crème Brûlée ahead of time?
Absolutely! You can prepare the custard up to two days in advance. Just caramelize the sugar right before serving to maintain that satisfying crack.
2. What kind of torch should I use?
A kitchen torch designed for culinary use is best. It provides the right amount of heat and control needed for caramelizing sugar without affecting the custard.
3. Can I use flavored extracts?
Certainly! Feel free to experiment with different extracts like hazelnut or orange. Just adjust the quantity to taste.
4. Why did my Crème Brûlée curdle?
This often happens if the cream is overheated or if the egg yolks are cooked too quickly. Gentle heating is key to a silk-quality custard.
5. Is there a vegan version of Crème Brûlée?
Yes! Swap out dairy with a blend of silken tofu, coconut milk, and plant-based sweeteners. It may take some experimentation, but you can achieve a delightful vegan version.
6. How do I know when my Crème Brûlée is done?
The edges should be set while the center still has a slight jiggle. It will continue to firm up as it cools.
Conclusion
Making Crème Brûlée at home isn’t just a culinary task; it’s a delightful adventure that culminates in a luxurious treat. The process merges simple ingredients into something beautiful and satisfying.
With a touch of patience and creativity, you too can share this classic French dessert with loved ones.
So grab your ramekins, unleash your inner chef, and let this delicious journey turn into a memorable gathering.
Whether it’s a beach picnic, a rooftop barbecue, or a cozy dinner, this dessert will undoubtedly become a standout moment. Happy cooking, and enjoy those delightful cracks of sugar!