Before we dive into the recipe for easy refrigerator pickles, let’s talk about what to serve these flavorful bites with. You might find yourself reaching for pickles whenever you fire up the grill. That’s no surprise. Dishes like burgers, sandwiches, and barbecued meats benefit immensely from the tangy crunch of a quick pickle.
Picture this: you’re hosting a backyard cookout. The sun is shining, the grill is sizzling, and you have a platter of grilled chicken ready to go. Now, imagine adding a side of crispy, tangy refrigerator pickles. They would perfectly balance the richness of the chicken and elevate your gathering. How about a classic deli-style sandwich? A few pickle slices on that sandwich turns a simple lunch into a deli experience.
Or let’s consider potato salads and creamy coleslaws, where the acidity of pickles creates a harmonious blend. You can even enjoy them straight from the jar as a snack or as part of a cheese board, setting a delightful contrast of textures and flavors.
Are you ready to roll up your sleeves? Let’s explore the world of easy refrigerator pickles!

I’ve always had a love affair with pickles. I remember standing on a chair in my grandmother’s kitchen, mesmerized as she turned fresh cucumbers into vibrant jar after jar of pickles.
She taught me that pickling wasn’t just a method; it was a tradition of preservation and flavor. Fast forward to today, and I recreate her magic in my own kitchen. What’s great about easy refrigerator pickles is that you don’t need to master extensive canning techniques or spend hours over a hot stove. With this recipe, you’ll have delicious pickles ready in no time.
Refrigerator pickles are quick, simple, and incredibly versatile. They can jazz up sandwiches, serve as a delightful snack, or accompany any meal. Trust me, once you try them, you’ll wonder how you lived without them.
What are Easy Refrigerator Pickles?
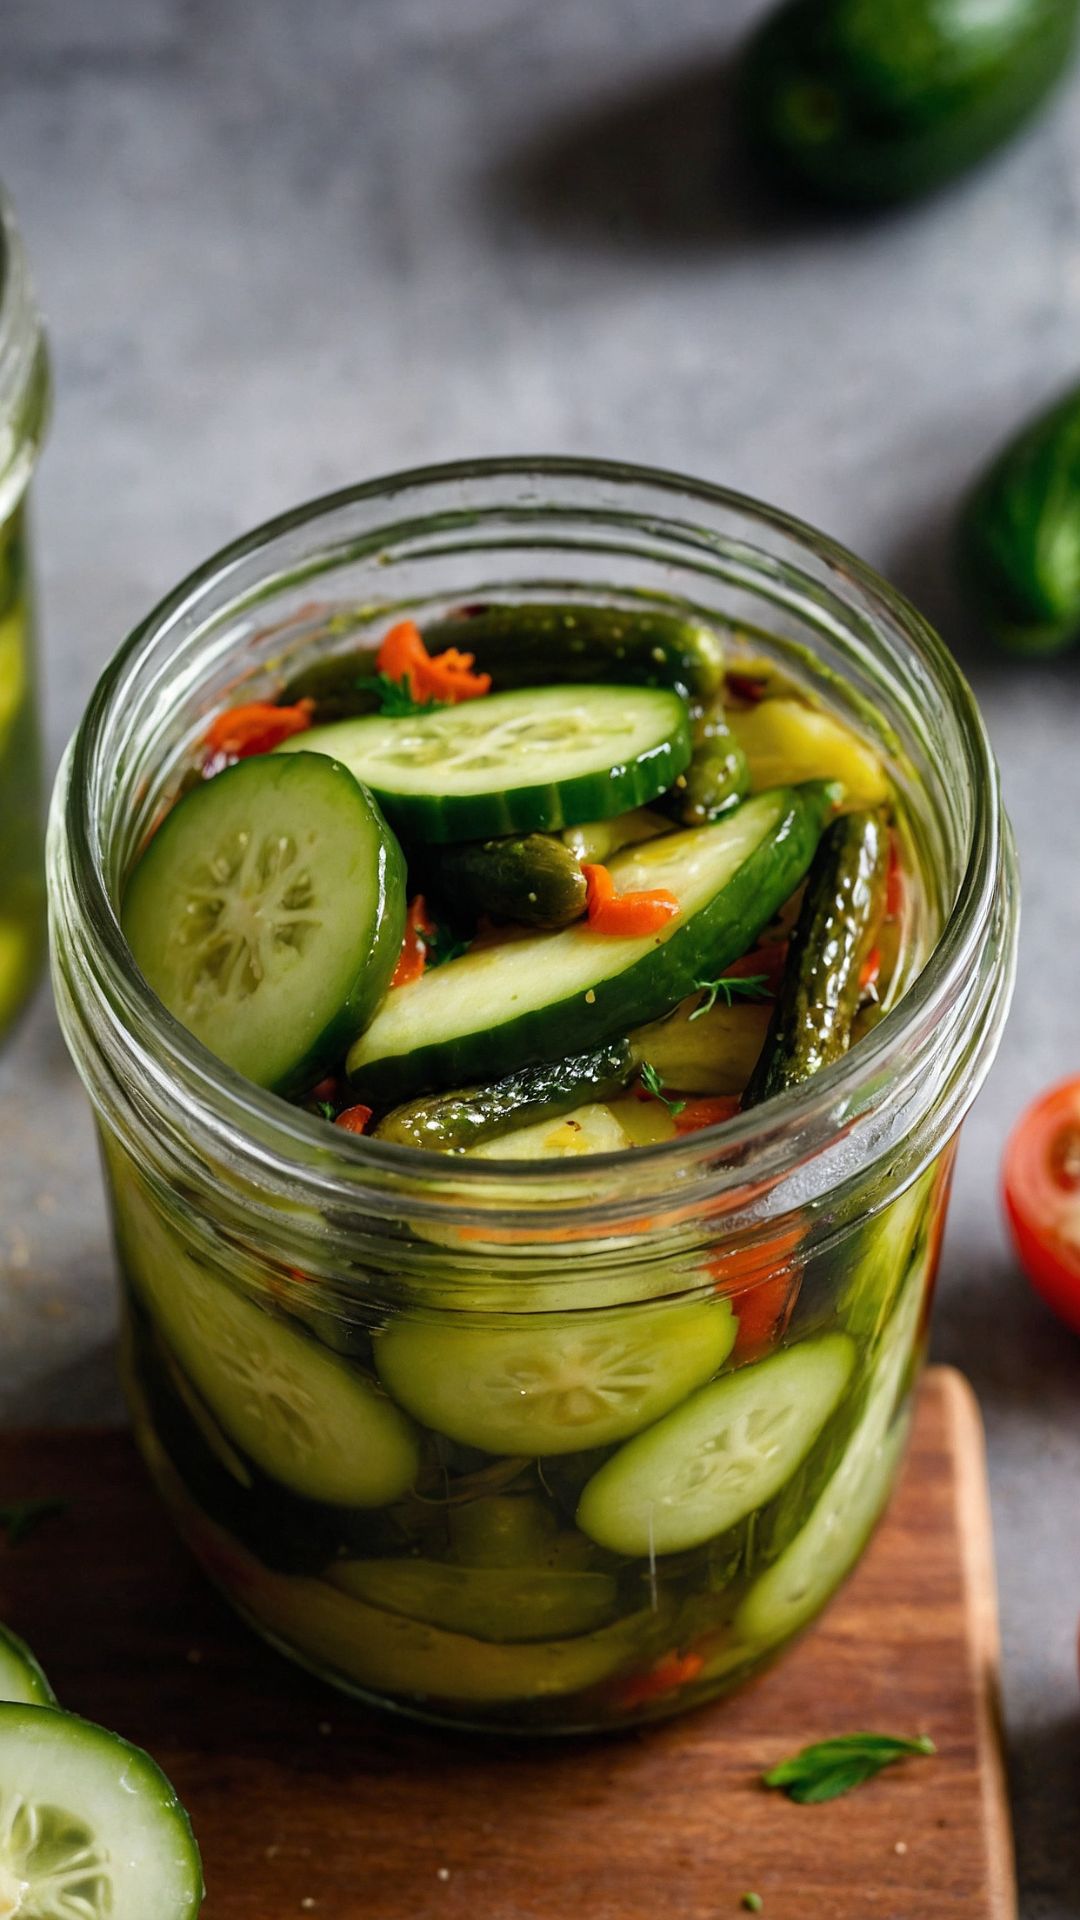
Easy refrigerator pickles are cucumbers (or other veggies) that are pickled in a simple brine solution and stored in the refrigerator. Unlike traditional pickles, they do not require any canning equipment or long processing times. They can be enjoyed just a few hours after preparation, but the flavor improves after a day or two. The beauty of refrigerator pickles lies in their versatility. You can adjust the spices, sweetness, and acidity to suit your taste.
You will also like the following Side dishes recipes!
Why Does This Recipe Work?
This recipe for easy refrigerator pickles succeeds due to its balance of flavors and convenience. The combination of apple cider vinegar, sugar, and spices creates a well-rounded brine. Fresh ingredients like dill and black pepper elevate the taste. Plus, it’s adaptable; if you’re feeling adventurous, you can throw in some garlic or even chili flakes for a spicy kick.
This method allows the cucumbers to stay crispy while soaking up all the flavors. As a registered dietitian, I appreciate how this dish can integrate into a balanced diet without hassle. You don’t need hours of preparation.
What You’ll Need to Make This Dish
- 1 pound Kirbys (or any small, firm cucumbers)
- 1 tablespoon fresh dill sprigs
- 1 teaspoon whole black peppercorns
- 1 cup filtered water
- 1 tablespoon coarse kosher salt
- 1½ teaspoons classic pickling spice blend
- ¼ cup granulated sugar
- 1 cup apple cider vinegar (raw or unfiltered adds extra tang)
These ingredients are simple, easy to find, and often already in your pantry. Now, let’s get to the good stuff – how to make these delicious pickles!

A Brief Overview of How to Make Easy Refrigerator Pickles
Before we break it down into steps, let me tell you that this recipe will not take more than 30 minutes from start to finish. After a little prep work, all you have to do is let your cucumbers soak. The results will be crunchy, refreshing, and full of flavor. Let’s dive into the step-by-step process.
Step 1: Prepare the Cucumbers
Start by washing the cucumbers thoroughly. Since we’re leaving the skin on, it’s essential to clean them well. Then, slice the cucumbers. You can opt for rounds, spears, or even cute pickle chips. The choice is yours! Just remember that the size can impact the brining process; smaller pieces will absorb the marinade quicker.
Step 2: Create the Brine
In a medium saucepan, combine the water, apple cider vinegar, kosher salt, granulated sugar, and pickling spice blend. Bring this mixture to a gentle boil, stirring until the sugar and salt dissolve completely. This is your pickling brine – the magic potion that transforms ordinary cucumbers into scrumptious pickles.
Step 3: Add Aromatics
Once the brine is ready, remove the saucepan from the heat. Toss in the whole black peppercorns and fresh dill sprigs. Let this mixture sit for about 10 minutes to infuse flavors. The aroma will fill your kitchen, and trust me, you’ll feel like a culinary pro.
Step 4: Combine
Take a clean glass jar with a lid (a quart-size mason jar works beautifully for this). Place your sliced cucumbers inside the jar. Pour the warm brine over the cucumbers, ensuring they are submerged. If you have extra cucumbers, just grab another jar and repeat the process!
Step 5: Chill Out
Allow your pickles to cool to room temperature before placing them in the fridge. The flavors develop better this way. Once at room temperature, screw on the jar lids and tighten securely. Refrigerate your pickles. In about 2-4 hours, they’ll be ready to enjoy typically but let them sit for a day for full flavor.
Tips for the Perfect Pickles
Here are some pearls of wisdom I’ve gathered over the years to ensure your pickles turn out just right:
- Use Fresh Vegetables: Choose small, firm cucumbers. Freshness equals crunchiness.
- Cool Your Brine: Let the brine cool slightly before pouring it over your cucumbers. It helps maintain texture.
- Tweak as Desired: Feel free to play with spices. Add garlic cloves, red pepper flakes, or even mustard seeds for a twist.
- Wait for Flavor: While you can munch on them after a few hours, waiting 24-48 hours enhances their flavor.
- Always Use Clean Jars: For safe storage, ensure your containers are sterilized. A quick wash with hot soapy water or a rise through the dishwasher does wonders.
How to Store Leftovers
Keep your easy refrigerator pickles in the fridge, tightly sealed in their jars. They can last for up to two weeks if stored properly. Make sure to always use a clean utensil when retrieving pickles to ensure they stay fresh.
Nutrition Information
Here’s a quick look at the nutritional benefits. Per serving (around 4-5 pickle slices), easy refrigerator pickles contain roughly:

They are low-calorie and low-fat, making them an excellent snack option!
How Would I Recommend Serving Easy Refrigerator Pickles?
Here are four delightful ways to serve your easy refrigerator pickles:
- In Sandwiches: Layer slices on a turkey or veggie sandwich. The crunch and tanginess balance creamy or fatty elements like cheese or mayonnaise.
- As a Snack: Serve them as part of a snack board. Pair with various cheeses, crackers, and meats for a fantastic appetizer spread.
- On Burgers: Top off your burger with a few pickle slices. They add the perfect zing and crunch.
- With Charcuterie: Include them on a charcuterie board. Easy refrigerator pickles are an excellent addition, cutting through rich flavors with their tanginess.

What Alternatives Can You Use for the Ingredients If Not Available?
Sometimes you may not have all the ingredients on hand. Here are some reliable substitutes:
- Kirby Cucumbers: Use English cucumbers if you can’t find Kirby. Just slice them thinner since they tend to be less crunchy.
- Apple Cider Vinegar: White wine vinegar or rice vinegar works as alternatives, though each has a slightly different flavor profile.
- Dill Sprigs: Dried dill can replace fresh dill; use about a teaspoon of dried dill for a similar flavor punch.
- Granulated Sugar: Honey or maple syrup can replace granulated sugar for a natural sweetness.
Equipment
- A glass jar
- Mixing bowl
Ingredients
- 1 pound Kirbys
- 1 tablespoon fresh dill sprigs
- 1 teaspoon whole black peppercorns
- 1 cup filtered water
- 1 tablespoon coarse kosher salt
- 1½ teaspoons classic pickling spice blend
- ¼ cup granulated sugar
- 1 cup apple cider vinegar
Instructions
Step 1: Prepare the Cucumbers
- Start by washing the cucumbers thoroughly. Since we’re leaving the skin on, it’s essential to clean them well. Then, slice the cucumbers. You can opt for rounds, spears, or even cute pickle chips. The choice is yours! Just remember that the size can impact the brining process; smaller pieces will absorb the marinade quicker.
Step 2: Create the Brine
- In a medium saucepan, combine the water, apple cider vinegar, kosher salt, granulated sugar, and pickling spice blend. Bring this mixture to a gentle boil, stirring until the sugar and salt dissolve completely. This is your pickling brine – the magic potion that transforms ordinary cucumbers into scrumptious pickles.
Step 3: Add Aromatics
- Once the brine is ready, remove the saucepan from the heat. Toss in the whole black peppercorns and fresh dill sprigs. Let this mixture sit for about 10 minutes to infuse flavors. The aroma will fill your kitchen, and trust me, you’ll feel like a culinary pro.
Step 4: Combine
- Take a clean glass jar with a lid (a quart-size mason jar works beautifully for this). Place your sliced cucumbers inside the jar. Pour the warm brine over the cucumbers, ensuring they are submerged. If you have extra cucumbers, just grab another jar and repeat the process!
Step 5: Chill Out
- Allow your pickles to cool to room temperature before placing them in the fridge. The flavors develop better this way. Once at room temperature, screw on the jar lids and tighten securely. Refrigerate your pickles. In about 2-4 hours, they’ll be ready to enjoy typically but let them sit for a day for full flavor.
Notes
- Use Fresh Vegetables: Choose small, firm cucumbers. Freshness equals crunchiness.
- Cool Your Brine: Let the brine cool slightly before pouring it over your cucumbers. It helps maintain texture.
- Tweak as Desired: Feel free to play with spices. Add garlic cloves, red pepper flakes, or even mustard seeds for a twist.
- Wait for Flavor: While you can munch on them after a few hours, waiting 24-48 hours enhances their flavor.
- Always Use Clean Jars: For safe storage, ensure your containers are sterilized. A quick wash with hot soapy water or a rise through the dishwasher does wonders.
Nutrition
Frequently Asked Questions
1. Can I use other vegetables for pickling?
Absolutely! Carrots, radishes, onions, and green beans can all be pickled. Each vegetable has different brining times, so some may need longer than cucumbers.
2. How long do refrigerator pickles last?
Stored correctly in the refrigerator, they can last up to two weeks. After that, they should be discarded for safety.
3. Can I modify the sugar content?
Yes! Feel free to reduce the sugar if you prefer tangy pickles, or increase it for sweeter ones, but balance is key.
4. What if I don’t have pickling spice?
Make your own pickling spice by mixing equal parts of mustard seeds, coriander seeds, dill seeds, and a pinch of red pepper flakes.
5. Is it safe to eat pickles that have changed color?
If you notice discoloration in your pickles, it might be best to discard them. However, minor color changes can occur naturally and are not always a sign of spoilage.
6. Can I process these pickles for shelf storage?
Yes, if you wish for long-term storage, you can process them in a water bath canner; just be mindful to adjust the recipe for traditional pickling ratios.
Conclusion
Making easy refrigerator pickles is not just about convenience; it’s about embracing fresh flavors right in your home kitchen. With just a handful of ingredients and some simple steps, you can create a delicious accompaniment for almost any dish. The flexibility of this recipe allows you to express your taste preferences and embrace your creativity.
So, fire up your refrigerator and get pickling! Whether you choose to crunch on them as a snack or serve them alongside your meals, I assure you, these pickles will quickly become a staple in your kitchen. Happy pickling!